

Top frequently asked questions
Camera FV-5 already supports RAW capture, and we don’t have to implement anything, the device manufacturer has, and it has to enable it for third-party apps. There’s nothing we or other app can do to implement RAW capture if the manufacturer has not done its job or the hardware is not capable of RAW capturing. You can check if your device supports and exposes RAW capture in the device database.
Why are you so sure? Better ask yourself why you paid so much for that phone.
Each device is different, and each supports a different range of exposure times. Camera FV-5 reads the actual range supported by your phone, and this is the one that lets you use. We haven’t designed your phone, so we can only let you use the exposure times supported by your phone manufacturer. Camera FV-5 cannot exposure longer if your phone does not support it.
Common questions
Saving to the external SD card is done in different ways depending on the OS version you have:
-
Android 5.0 or newer: go to Settings / Basic settings tab / Storage location, and select Custom. A file browser will open. Tap on the hamburger button (the button with three lines stacked on top of each other, on the top left side of the screen), and select External SD card. Then, browse to the specific folder you want inside the SD card. If the External SD card menu is not available after tapping on the hamburger button, you might need to enable the external storage by tapping on the vertical three dots button on the top right corner of the screen, and tap on Enable external storage.
-
Android 4.4: unfortunately, on Android 4.4 it is not possible to use the external SD card. For more information, read the following question.
-
Android 4.3 and earlier: go to Settings / Basic settings tab / Storage location, and select Custom. A file browser will open. Browse with the folder browser to the SD card folder. Usually, you will find the SD card mapped as a folder inside mnt or storage, and it is usually called extSdCard, externalSd, sdCard1 or similar.
Unfortunately, Android 4.4 KitKat OS blocked third party apps from writing to the external SD memory card. While on Nexus phones this doesn’t have any impact (they don’t have external SD memory slots), on devices with external memory slots this is annoying. Camera FV-5 implements a hack that makes this work on many phones, most of them Samsung devices, but this is a temporary fix, as the vulnerability used to access the SD card can be fixed and closed, and this hack wouldn’t work again. If it is not working for you, unfortunately, there’s nothing that can be done about this, besides hoping that either Google or other OEMs (Samsung, HTC, etc.) change their minds regarding this issue that is severely affecting many applications, not just Camera FV-5. Starting with version 1.63, Camera FV-5 detects when you choose a non-writable location or a non-writable folder was already defined before the update to KitKat, and reverts to internal storage and notifies you about this issue. Rooting your device will allow you to continue saving photos to the external SD card on phones where the hack is not working, but this is not encouraged, as it voids the warranty of the device.
Note: As many users have pointed out, there is a directory private to the application in the external SD card where it seems that it is indeed possible to write pictures to. However, all files (photos in this case) stored in the app’s private directory gets deleted when the app is uninstalled or reinstalled. Since this behaviour of the folder is now known (it is called private for a reason, and is meant to be used for developers only), and uninstalling and reinstalling an application is so a common task, there is a huge risk of all your photos being deleted irreversibly. Therefore, I encourage you to stay completely away from doing this. You have been warned!
A good read about the problematic can be found on this article: http://www.androidheadlines.com/2014/03/ah-primetime-googles-push-secure-android-sd-card-support-kitkat.html. Unfortunately, we, the app developers, are the ones in charge to explain users the decisions of others (Google and OEMs)…
No. Actually, this is completely normal, and reflects how the new camera controller introduced with Android 5 works internally. With this new camera subsystem, both shutter speed and ISO must be either both automatic or both manual, but not any other combination (one parameter automatic while the other set manually). Unfortunately, there is nothing app developers can do about it, and Camera FV-5 only tries to show in the user interface what is actually going on inside.
Unfortunately every different Android device is a complete different world, even more regarding the camera hardware. Much effort has been done to address differences in hardware, but still there is no guarantee that feature X works. You can check the support of different features on the device database.
Android 2.x (obsolete, Android 2.x is not supported anymore):
Touch-focus is not supported by Android 2.x OS directly, and every manufacturer implements touch-focus feature in an undocumented, different way; some others directly don’t expose such functionality to applications; while others don’t bundle that functionality in the camera driver. Camera FV-5 packs many hacks to support some Motorola, HTC and Nvidia camera drivers. Other phones, like some Samsung phones, are also supported. Unfortunately, there’s little to do from the application side when there is no standard way to access touch-focus, and manufacturers don’t cooperate with information about their specific implementations. If not supported, touch-focus mode falls back to AF mode.
Android 4+:
Touch focus is officially supported in Android 4.0+, and does so Camera FV-5, too. Therefore, touch focus should work on almost all devices running Android 4 Ice Cream Sandwich (ICS) onwards. However, some manufacturers, although providing touch focus on their stock camera applications, do not extended that support to third party applications.
Several factors affect photo processing time. However, most likely the culprit is:
- PNG format: bigger file sizes take longer to write to the memory card, and PNG takes a lot of time to compress, even on modern hardware.
When the focus rectangle turns red (and the app plays 4 quick beeps) it means that the focus operation failed for some reason. Most likely the focus distance was too short, there was not enough texture for the application to focus correctly or simply the camera doesn’t have autofocus and Camera FV-5 didn’t detect it. In those cases, Camera FV-5 cancels the photo because it understands that it is not useful to get photos out of focus. You can however change that by activating the option Settings > General camera settings > Allow taking a photo without focus. In case your camera lacks autofocus, you can directly skip focusing when you capture a picture. To do that, deactivate the option Settings > General camera settings > Focus before capturing.
Android 5.0 Lollipop:
There’s indeed manual focus support in Android 5.0 Lollipop, but the manufacturer must implement a full-compliant camera driver. If you don’t see the manual focus mode in Camera FV-5, it means that your phone does not support it. You can check which devices support manual focus in the device database.
Android 4.4 KitKat or older:
Manual focus is not controllable by third party applications running on Android 4.4 KitKat or older. The camera driver does it internally, but doesn’t expose that feature to be controlled by an app. Support for manual focus was added in Android 5.0 Lollipop, but still the phone has to support it. If your manufacturer updates and implements a full-compatible camera driver for Android 5.0, Camera FV-5 will offer you the manual focus mode. Anyway, you can move the focus point to the nearest point by selecting the ![]() (macro) focus mode, or to the infinity (the farthest point) by selecting
(macro) focus mode, or to the infinity (the farthest point) by selecting ![]() (infinity) focus mode. By using the macro focus mode, and not triggering the focus, you can achieve quite nice bokeh effects.
(infinity) focus mode. By using the macro focus mode, and not triggering the focus, you can achieve quite nice bokeh effects.
Scene modes are nothing more than names for setting presets. If you really understand what do you want to shoot, you need no scene modes. The parameters are there: sports scene can be achieved using shutter speed priority mode and short exposure time, for example. Some scene modes just set the parameters the camera maker believe that are the best for that situation, but may not be the ones you really need. If you really need scene modes, you have plenty of offerings already.
Funny filters can be applied in post-processing. Don’t ruin your memories with fun filters, seriously. You may change your mind later about the effect, but it is too late, the original photograph is lost forever. Ultimately, if you really need fun filters, you already have plenty of applications for that purpose.
Android 5.0 Lollipop or newer:
You can set the exposure manually, and then select the longest exposure available to take a full resolution, long exposure photograph. If you still get low resolution images in this mode, it means that although you are using Android 5 or newer, the manufacturer of your phone has not implemented this feature (full-resolution long exposure capture) and Camera FV-5 is resorting to the compatibility mode (for Android 4.4 or older).
Android 4.4 KitKat or older:
In Android 4.4 KitKat or older, there is no support for long exposures (longer than half of a second). Therefore, Camera FV-5 capture the sensor live view feed directly and perform the exposure by software. The problem is that, given that the application need the sensor feed, it is limited to the maximum resolution the camera driver provides live view feed. That maximum resolution is often bigger than the screen resolution of your phone, but still, no phone provides full resolution sensor feeds to applications. On most phones, the maximum feed resolution is 1 MP, while on newer phones is 2 MP. There is no other way to achieve true long exposures under Android 4.4 or older.
It might happen that you need to activate Settings > General camera settings > Compatibility > Pause between shots, and then set the “Pause duration” setting to “Long”. It happens on some Samsung devices and others as well that the exposure time of the photo doesn’t change immediately, and a pause between the shots of the bracketing is required.
Some camera hardware reset the focus after taking a shot. You can force in that case Camera FV-5 to refocus after each shot. To do that, activate Settings > General camera settings > Compatibility > Refocus after every shot.
Android 5 or newer:
If your phone is running Android 5 or newer but you don’t have manual exposure control, it means that the manufacturer of your phone has not implemented a full-compliant camera driver for your phone, or you received an update for Android 5.0 but your phone was not originally built for Android 5.0. Then, there is a legacy camera driver that does not support manual exposure.
Android 4.4 KitKat or older:
Accurate exposure control like traditional DSLRs have (in fractions of second) is not possible on Android devices on mobile phones running Android 4.4 KitKat or older, because the camera drivers does not provide us the developers access to that control. Short, Long and Long+ are just hints to the driver to set a short (around 1/30s), long (around 1 second) and very long (around 2 seconds) exposure time, but that’s all you can do right now. The only exceptions to this are the following phones and cameras that have manual exposure control with Camera FV-5 despite running pre-Android 5.0 versions:
- Samsung Galaxy Camera.
- Samsung Galaxy Camera 2.
- Samsung Galaxy S4 Zoom.
- HTC One (2014, M8).
This surely is the result of wrong camera parameters. Check those:
- Exposure time: exposure times longer than 1/30th of a second have a high risk of producing blurred pictures, because during the exposure there’s enough time for you to move the camera. Try changing program mode, specially switching to speed priority, and selecting Short. Other parameters can also help reducing exposure time, like raising ISO.
- Focus mode: be sure that the subject you want to capture is in focus. If you are shooting a far landscape, consider using Infinity focus mode, a worry-free quick solution in these cases.
While we are happy to see all those custom ROMs and the effort they are doing by bringing new features and new Android versions to old devices, it is also worth noting that most of them don’t comply to the Android standards. That is, they do not comply with the documentation and the different contracts defined on it (what functions should return in special cases, etc.). Many of these ROMs also do not pass the Android CTS (Android Compatibility Test Suite), therefore, although they might be able to run many applications without problems, others, like Camera FV-5, that relies on many critical functions, specially with the camera driver, may fail. Also, many ROMs bring newer Android versions to older devices that officially cannot run them, and while sometimes they can (the manufacturer don’t want to commit resources to updates), others the are reasons and important incompatibilities that compromise the stability of the applications running on top of those ROMs. Camera FV-5 officially supports all official OEM’s ROMs with all their glitches and bugs, but we cannot officially support all the (thousands of) custom ROMs out there with their own peculiarities (it’s their task to comply and pass the CTS). In case something does not work, our advise is to contact the ROM developers first and explain them the problem and the situation to see if they (with knowledge about what they do with their ROM) can help with this.
App usage
First of all, go to Settings > General camera settings > Play camera sounds, and deactivate that option. That deactivates all sounds played by Camera FV-5 when focusing or taking photos. On most devices, setting the ringer to silent, will silent both shutter sound and focus confirmation and failure sounds.
Unfortunately, this doesn’t work on some devices that enforce the shutter sound for privacy reasons. Many phones enforce the shutter sound so that it plays loudly and you are not able to use it in places where you are not intended to. In those cases, application cannot silent is no matter what they do. If you have your phone rooted, it is still possible to silence shutter sound by removing the .ogg file related to the shutter sound in the folder /system/media/audio/ui. However, you will need an advanced file manager application for Android in order to access such folder, since is a system folder. The stock Android file manager doesn’t let you access that folder.
You are using an external gallery app for viewing your images, and this gallery does not support browsing images other than the current one. You have two options:
- The best one: use the integrated Camera FV-5’s image gallery. Be sure you are using Camera FV-5 3.0 or newer. Then, disable the option Settings > General camera settings > Prefer external applications.
- If you want to keep using an external app for viewing your images, you will have to use another one (for instance Google Photos). This problem does not have anything to do with Camera FV-5.
Camera FV-5 is what you see is what you get. Therefore, the photos are saved exactly as you saw them on the viewfinder.
That being said, it might happen that the viewing conditions when you took the photo are not the same as when you review them. Camera FV-5 maximizes the screen brightness in order to improve viewfinder’s visibility and detail when you shoot outdoors. However, the screen brightness is restored to your default settings when you leave Camera FV-5, for instance, for reviewing photos on another application. In those situations, your screen settings determine the screen brightness. Unless you have the screen brightess at full (which is not usual, as it consumes more battery), you will see pictures dullier than normal. The photos are the same, it is just the screen brightness might make you think photos are punchier.
If you want a more accurate viewfinder, you can deactivate the screen brightness maximization while operating Camera FV-5 on Settings > Viewfinder > Maximize screen brightness (uncheck it). However, this just will make your screen darker, but has no effect on the picture exposure time.
If the ISO button is grayed out, it means that Camera FV-5 has detected that the parameter does not exist on the camera hardware or it has been blocked from being modified.
Sometimes the ISO button is available, but changing the ISO does nothing. Unfortunately, many phone makers have blocked third party applications from modifying this parameter by hiding it to third party applications. Even modifying it directly results in the camera not taking it into account. The camera will use ISO automatic in this case. Although Camera FV-5 has nothing to do in those cases, it tries at least to detect this and make the button unavailable.
We are always working to have Camera FV-5 control all the parameters on all phone models, and it might happen that support for the ISO comes with future OS updates (which of course impact the capabilities of Camera FV-5) and app updates. You can see in the device database which ISO values are available to third-party apps like Camera FV-5.
Be sure that:
- The app is effectively set to play camera sounds (Settings > General camera settings > Play camera sounds).
- The media volume is set to something else than silent. Although with the volume keys just the master volume is set, there are 4 different types of volumes. After pressing the volume keys while not on vibration or silent modes, tap on the cog next to the volume slider to adjust all system volumes. Check that media volume is not silent.
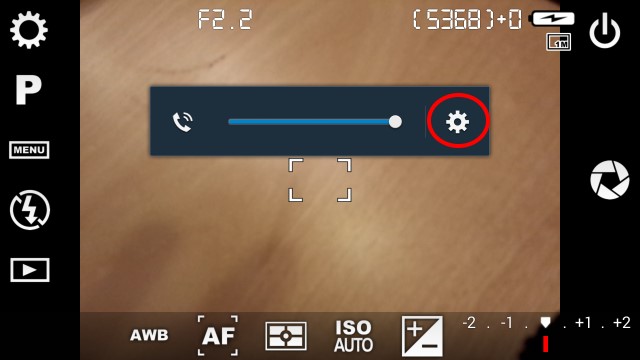
Volume indicator after pressing the volume keys.

All system volumes. Check that media volume is not silent.
Photographic concepts
On mobile phones, the aperture is not adjustable, because mobile camera modules have a fixed aperture. The aperture of the lens depends approximately on the diameter of the lens. Conventional cameras with adjustable aperture have blades that close or open to reduce or increase the amount of light reaching the sensor, respectively. Those blades usually have the look of the virtual shutter icon button that used on the app, but ironically, mobile phones doesn’t have such blades, nor any kind of device that is able to close the diameter of the aperture. Therefore, the aperture is inherently fixed on those camera modules, and therefore, no application will be able to control the aperture. The aperture (F-number) shown is queried to the camera driver, and it is also the maximum aperture, as, given the diameter of the lens, cannot be larger, without building the lens differently.
The white balance algorithm exists to compensate the color biasing of different illuminants. The color of the objects you see is composed of the intrinsic color the object has, plus the color temperature of the light is reaching the object. Warmer light sources, like warm fluorescents produce warmer colors, while the light of the sun is colder (produces color tints towards the blue/purple). Therefore, the white balance algorithm is there to correct those color casts (nobody expects a photo of a computer screen completely blue, or an scene inside an incandescent bulb reddish). The problem comes if you mix different sources of lights with different color temperatures. The white balance algorithm will compensate the dominant light source, and the object illuminated by the other will produce unrealistic colors. Therefore, this problem is likely to happen with mixed lighting, which is not the most common case. A very illustrative example is shown here: http://www.cambridgeincolour.com/tutorials/white-balance.htm at the end of the article, under the heading “In mixed lighting”. If you want to compensate another light source than the one the camera has chosen, you can tap on the AWB icon at the bottom of the viewfinder and select the light type you want to compensate.
Purchasing/payments
Definitely! You can install not only Camera FV-5, but all your paid applications on all the phones you own at no extra cost.
To do that (in general, the same works for all applications):
- Add the account you used to purchase your paid applications if you don’t have them added to your device yet. You can do it manually on Android settings / Accounts / Google. After a factory reset, you are asked in the device setup to do this as well.
- On Play Store app, be sure that you have the right account active. To check that, open the left drawer by sliding from the left side of the screen to the right, and check in the drop down menu that the right account is selected (you can switch from one to other to select the current active one for apps).
- Search for the app (
Camera FV-5in this case), and then you should see an Install button instead of Buy. - Tapping on Install will install it like it were free, with no request for payment.
- If you still see the Buy button, make sure that you selected the right account you used to purchase the app (you might have used more than one account to purchase apps in this case).
You need Internet connection the first time you use the application, because the license verification tests against Google Play that you have actually bought the application. You just need to do it once, that is, once the application is verified, you can use it forever without any license checks and without requiring Internet connection. Therefore, be sure to have a proper network connection to let the application verify the license once.
If the problem still persists, try reinstalling the application. Google Play remembers that you have bought the application and you can download it again without paying twice. Furthermore, you are allowed to install the application in all your devices that you own, given that you use the same account in all of them.
Also, some users reported in the past that, when the licence cannot be verified, emptying the Google Play Store cache solved the problem.
You can solve the problem by trying the following things:
-
Try to go to the Google Play on the app, and download the app again. Be sure to be using the same account you used to purchase the app on the first place (check on the drawer on the left on the Google Play app). If you see the price of the app instead of the Install button, it means that either the currently selected account is not the one that was used to purchase the app, or the purchase didn’t go through.
-
Try deleting the Google Play cache. To do that, go to Android settings / Apps (or Application manager on some devices) / Google Play, and tap on the Clear cache button. Then, try downloading the app again.
Obsolete questions
The following questions are no loger relevant. They are kept here if you are using an older version of Camera FV-5 on an old device that does not support the latest versions of the app.
Obsolete. It does not apply to modern devices anymore.
Android enforces a 32 MB memory limit per application, regardless of the total memory available on your device. On older devices, the per application limit was 16 or 24 MB. That is very stupid, as it complicates the processing of photos with such a low memory limit. There exist applications to increase that limit, but they require root permissions. The application have little to do in that matter, since PNG saving requires around 20 MB of memory for a 5 MP picture, or around 32 MB for 8 MP. Android 4.0 increases the per application memory limit, leaving enough space for PNG lossless compression, but as of Android 2.x, the memory limit is fixed, unless you have root privileges on your device. In case you have your device rooted, the free application VM Heap Tool on the Play Store lets you change the per application memory limit. Other users have reported than 48 MB is enough (that is the default per application memory limit of Android 4.0). Please note that I have no relation to that application, and I therefore take no responsibility of it.
Obsolete. It does not apply to modern devices running the latest version of the app.
The Android per application memory limitation also applies to long exposures. If not enough memory is available to the application, the error message «Not enough memory to create the exposure. Try lowering the resolution.» is shown, or, on older versions, the picture came out green (uninitialized). If the solution proposed on the last question is not applicable, the only solution is to lower the resolution of long exposure photos. On Camera FV-5 1.15 onwards, go to Preferences > General camera settings > Long exposure resolution and lower the resolution. By default, the largest resolution for long exposure photos is selected.
Camera FV-5 requires that the phone actually implements those features. Android 5 Lollipop (the OS) brings the possibility for manufacturers to implement those features, and applications to implement those. However, Google left all these features optional for manufacturers, and most of them that are currently updating their existing phones to Lollipop are not implementing them in order to rush an update to the market. From the equation, Camera FV-5 implements everything needed to use those features, Android Lollipop brings developers the possibility implement those features, but if you are not able to use them is because your manufacturer didn’t actually implement their part on their devices: RAW support requires the manufacturer to update the camera driver (for instance).
To check which devices support specific features, please check the device database, which keeps an updated list of devices and supported manual controls and RAW support.
Obsolete. This answer refers to Camera FV-5 3.X or older.
Swipe from the left bezel of the screen to the right (when holding the phone in landscape). The same to go to back to the rear one.
Obsolete. This answer refers to Camera FV-5 3.X or older.
If you get that error it means either that:
- The memory card or the internal memory has been ejected (that is, the phone doesn’t have a physical storage media inserted where to store photos to).
- The phone is connected with USB to another device (i.e. computer). While connected to another device, the memories (internal and external) are unmounted (disconnected) from the device so that they are available on the other device.
In any of those cases, Camera FV-5 doesn’t have any storage media available to write photos to. Check with a file manager application whether the storage media is really available or not.
Issues specific to older, obsolete devices
These questions apply to older devices no longer in production, and these questions are most likely even no longer relevant with the latest version of the app.
RAW support in Camera FV-5 is only available with the original CyanogenMod 11 operating system, or the update to it, CyanogenMod 12. Other ROMs, specifically the Oxygen ROM that can be sideloaded on the phone, do not support RAW capture. LineageOS ROMs do not support it either. If this functionality is important to you, stick to the original firmware. If you are reading this and still using the device, most likely you flashed a newer ROM.
Camera FV-5 requires Oxygen 2.1.2 or newer to use the RAW capture feature.
Obsolete. It applies to Camera FV-5 3.X or older only.
You can indeed adjust it, but not in automatic, Program mode (P). As things are working internally, ISO and exposure time but be set either both to automatic, or both manual. Therefore, in program mode (automatic exposure) ISO is not available. When you switch to Shutter speed priority (S) mode, the ISO parameter will be enabled. In fact, you must set the ISO to something other than automatic, and hence the ISO Auto button is disabled on the Sensor sensitivity toolbar.
Google broke the exposure compensation on those devices, citing “calibration issues” with the camera. Camera FV-5 implements a workaround, but it does not reflect the exposure compensation on the preview, only on the final captured image.
Yes, but not on Camera FV-5’s side. Although Android intended the manual focus mode to also cover infinity, on the current implementation on the Nexus 5/Nexus 6 (Android 5.0.1) the manual focus range does not include the infinity, and therefore the only way to focus on the infinity is either using autofocus ([AF]) or infinity focus mode [∞]. If Google releases an update for those devices, Camera FV-5 will be automatically fixed, as this is an error in the underlying Android code on its current implementation on those devices.
LG has implemented 2 different camera controllers. The camera controller the stock app uses has privileged access to the camera hardware, access that do not have third party apps like Camera FV-5. There’s not much we can do regarding that, and LG is to blame here.
Please be sure to update to the latest version of Camera FV-5, where this issue has been addressed without Sony’s help. Unfortunately, Sony has decided to play bad with third party apps, and it is limiting all applications but the built-in one to 8 MP maximum. There’s nothing wrong with Camera FV-5, and all other apps, including Google Camera. Simply Sony is limiting all third party apps to 8 MP. Unfortunately, there’s nothing we (or other camera apps) can do to change that. You can definitely contact Sony on the matter and make pressure to make them change it.